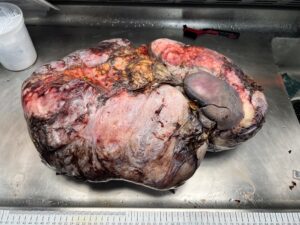
When a biopsy, or a larger specimen, is removed from the body, it goes through a series of steps which ultimately help your doctor or clinician form an effective treatment plan. While this process is basically the same for all specimens, the following is an overview of what happens to a skin biopsy once it is removed:
- Collection and Documentation: The skin biopsy is collected by a healthcare provider, typically a dermatologist or surgeon. They carefully remove a small piece of skin tissue for examination. During this process, the location, size, and appearance of the biopsy are documented.
- Fixation: The skin biopsy is placed in a container filled with a fixative solution, usually formalin. Fixation helps preserve the tissue and prevents decomposition. This step is critical to maintain the tissue’s structure and cellular details.
- Transport to the Pathology Lab: The container with the fixed skin biopsy is then transported to the pathology laboratory along with a requisition for all the necessary testing. It’s essential to handle the specimen carefully during this phase to avoid any damage.
- Accessioning: The specimen is logged into the laboratory information system where all the information about the client is verified and checked for accuracy. All insurance and other pertinent information is entered into the patient record during this step, including tests to be performed on the specimen
- Grossing: After all patient information is entered and verified, the specimen is examined by a technician who will determine the best way to process the tissue for optimal test results. This can include inking various surfaces, dissection of the tissue and sampling the pertinent areas for correct diagnosis.
- Processing: The biopsy is then processed. It involves dehydrating the tissue using a series of alcohol solutions, clearing it with xylene or similar substances, and embedding it in paraffin wax. This process allows the tissue to be thinly sliced for microscopic examination.
- Sectioning: The embedded biopsy tissue is cut into thin sections, usually about 3-5 micrometers thick, using a microtome. These thin sections are mounted onto glass slides.
- Staining: To enhance the visibility of cellular structures, the slides with the thin tissue sections are stained using various histological stains, such as hematoxylin and eosin (H&E). These stains help pathologists distinguish different cell types and structures under the microscope.
- Microscopic Examination: The stained slides are examined under a microscope by a pathologist or the pathologists’ assistant. They analyze the tissue’s cellular characteristics, structure, and any abnormalities.
- Diagnosis and Reporting: Based on their findings, the pathologist makes a diagnosis. If there are any abnormalities or diseases present, they provide a detailed report with their observations, including the type and extent of the condition.
- Archiving: After the diagnosis is made and the report is generated, the slides and any remaining tissue are usually archived for future reference, which is important for maintaining a patient’s medical history.
- Communication: The pathologist communicates their findings and diagnosis to the referring healthcare provider, which could be a dermatologist or another physician. The information is used to guide treatment decisions and patient care.
So, in summary, a skin biopsy undergoes a series of carefully controlled steps in a pathology laboratory to ensure that it can be examined microscopically, leading to a diagnosis or assessment. In the case of a skin biopsy, it is an assessment of any skin conditions or diseases.
If you would like to see a short video of this process, check it out HERE. Let me know in the comments below if you think we’re missing something!


